반응형
스프링 부트와 AWS로 혼자 구현하는 웹서비스 실습(Gradle 및 SpringBoot 버전 맞추기)
IntelliJ 프로젝트 생성하기

프로젝트 유형 그레이들(Gradle) 선택 생성
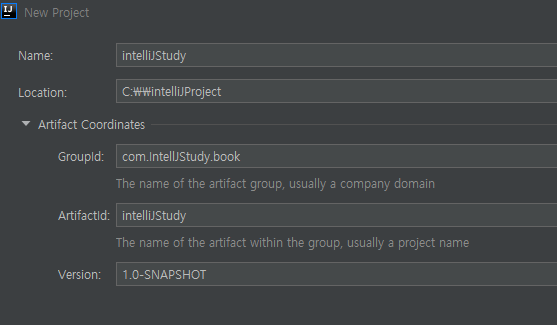
GroupId와 ArtifactId 등록 (ArtifactId는 프로젝트 이름)

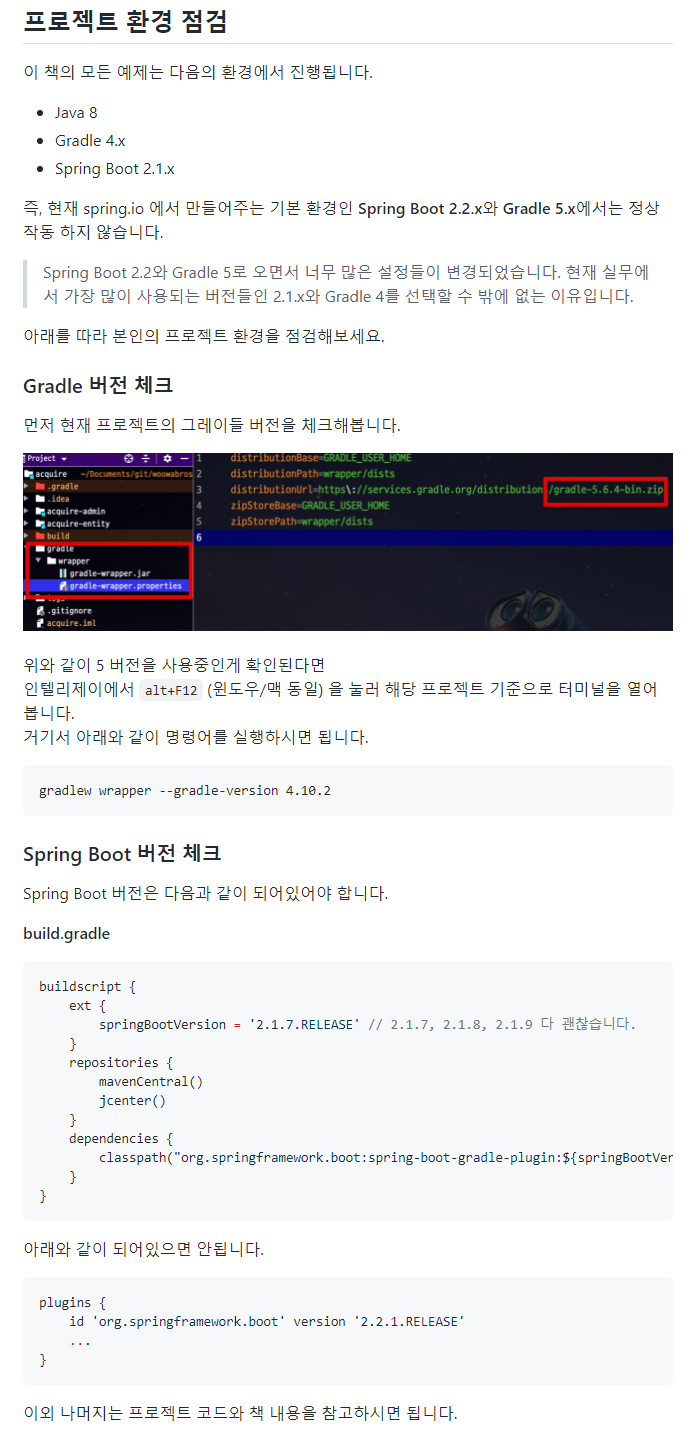
gradle 버전 확인

터미널(alt+F12) 열어 명령어 실행
gradlew wrapper --gradle-version 4.10.2
buildscript {
    ext {
        springBootVersion = '2.1.7.RELEASE'
    }
    repositories {
        mavenCentral()
        jcenter()
    }
    dependencies {
        classpath("org.springframework.boot:spring-boot-gradle-plugin:${springBootVersion}")
    }
}

apply plugin: 'java'
apply plugin: 'eclipse'
apply plugin: 'org.springframework.boot'
apply plugin: 'io.spring.dependency-management'

group 'com.IntelliJStudy.book'
version '1.0-SNAPSHOT-'

sourceCompatibility = 1.8

repositories {
    mavenCentral()
    jcenter()
}
dependencies {
    compile('org.springframework.boot:spring-boot-starter-web')
    testCompile('org.springframework.boot:spring-boot-starter-test')
}
build.gradle 수정하여 그레이들 프로젝트를 스프링 부트 프로젝트로 변경
프로젝트의 플러그인 의존성 관리 설정
IntelliJ와 깃허브 연결하기
Action 검색창(Ctrt+ Shift + A 단축키)
share project on githudb 검색
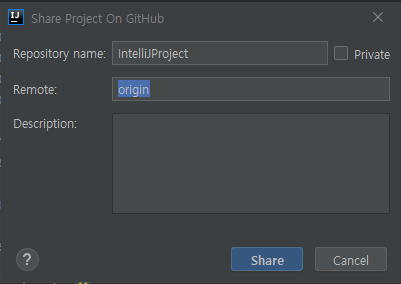
로그인 후 Repository 설정

.idea 디렉토리(인텔리제이에서 프로젝트 실행시 자동으로 생성되는 생성되는 파일) 체크 해제 (ignore 등록)
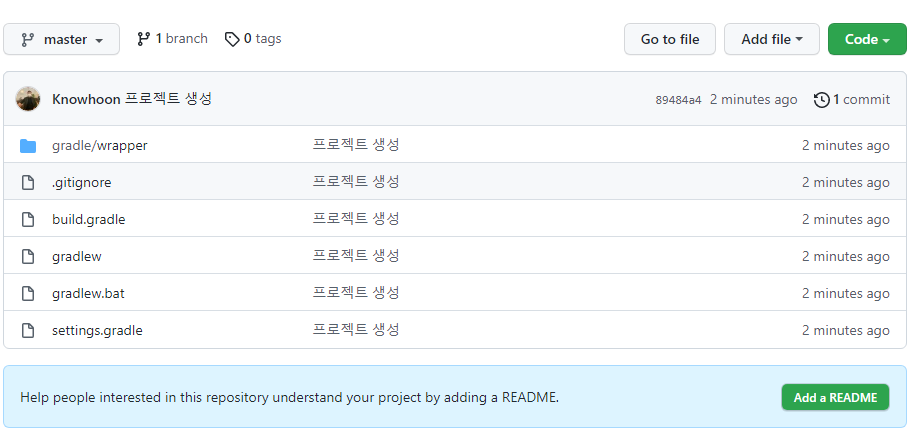
프로젝트 자동 생성
.gradle
.idea
gitignore 수정
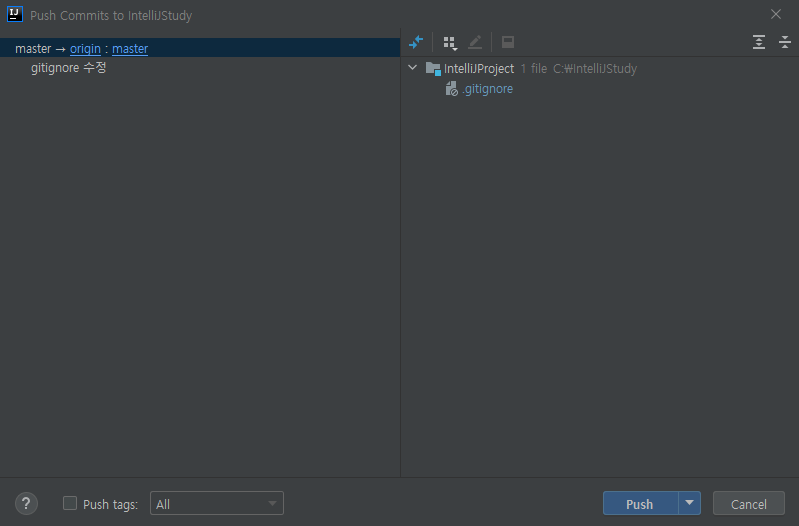
커밋 단축키 (Ctrl + K)
푸시 단축키 (Ctrl + Shift + K)

gitignore 푸시 확인
-IntelliJ 개발환경설정 끝
반응형
'IDE > IntelliJ' 카테고리의 다른 글
| IntelliJ_스프링 부트에서 JPA로 데이터베이스 다루기 (0) | 2021.10.27 |
|---|---|
| IntelliJ_스프링 부트에서 테스트 코드 작성하기 (0) | 2021.09.29 |